Showing posts with label Culinary Attempts. Show all posts

Friday, November 25, 2011

How to Choose, Prep, & Bake Yams

How to Cook Yams
{Choosing, Prepping, & Baking Yams}.
A day late, I know.


Step One: How to Choose Yams.
a. Go to the grocery store.
b. Find the yams. Which around this time of year are hopefully on sale.
c. Give them a once-over. Rule out the ugly ones. {Yes, I'm telling you to be judgemental}.
d. Pick some that are about the same size. Doesn't really matter what size, just that they're all consistent.
e. Check all your chosen yams to make sure they aren't soft or squishy in any way. Rock hard yams are a good thing when they're uncooked.
f. Once you've checked them and they're all wondeful, bag them and move on.

Step Two: How to Prep the Yams.
a. Line a baking sheet with foil and place it next to the kitchen sink.
b. Take the yams out of the bag.
They should have been stored in a decently cool, dry place where the air gets circulated, so that they don't rot. See the tips below to make sure the yams last as long as possible, especially if there's a delay from when you bought them to when you're going to bake and eat them.
c. One by one, run them under warm water in the sink and scrub them a little to get the dirt off. Secret college student tip? Use a paper towel instead of a veggie scrubber {those hard-bristled brush things that you use to wash/scrub veggies with, eg: carrots, potatoes, & yams} if you don't have one of those in your kitchen. I didn't have one and the paper towel worked just find, even when wet!
d. Arrange the yams on the baking sheet so that the pointy, skinnier end {if there is one} points toward the center of the baking sheet. This is an attempt to keep the smaller half from burning. Kind of like when you make cookies and place the smaller balls of dough on the inside so they don't crisp.

Step Three: How to Bake Yams.
a. Heat the oven to 450 degrees.
b. Once your oven beeps to let you know it's ready, open it up and stick your baking sheet with your yams on it onto the rack. I didn't really center my oven rack before sticking in the pan, so I don't really think it matters too much whether the yams are exactly in the center or towards the top or the bottom of the oven. Although heat rises, so keep that in mind.
c. Set the oven timer for 1 hour and 3 minutes.
d. Set your cell phone timer for 1 hour. This time gap allows you to check on your yams without having the oven shut off on you, just in case you need to leave them in there longer because they're not done yet.
e. Watch an episode of Castle while you wait. Or you know, be studious and listen to a lecture podcast. I should have done the latter, but did a variation of the former instead... *sheepish*
f. When your cell phone timer goes off, grab an oven mitt or potholder and caaaarefully open the oven door. Be forewarned, it's hot in there. Like... the-skin-on-your-face-gets-super-taunt hot.
g. Use the oven mitt/potholder to carefully pull out the baking sheet a little and poke the yams with a toothpick. Or an uncooked spaghetti noodle if you're a college student and didn't think to buy toothpicks {seriously, who uses those things on a regular basis anymore? Ew}.
If the yam insides are soft and you don't run into any random hard spots, they're done. If you meet resistance with your toothpick/noodle, push the pan back into the oven and increase the timer another ten-fifteen minutes and check back later.
h. When they're done, make sure the oven's been turned off and cancel the timer as well. Take the yams out of the oven and let them cool. If you leave them in, they'll just keep cooking-- it is 450 degrees in there, remember? That's going to take a while to cool down.
i. Once they're cool to the touch, pull one off the foil {and make sure none of the foil is playing stowaway on the bottom of your yam}, stick it on a plate, and enjoy!


Other random tips/observations:
1. Storing Uncooked Yams for Later Use.
I left my yams on the kitchen counter, away from the stove, until I was ready to bake them. You don't have to take them out of the plastic bag, but you do have to leave the bag open and make sure the yams can breathe {they're exposed to circulating air}. This keeps the yams from rotting too fast. I bought my yams a week before I used them and they were perfectly fine.

If a yam starts to rot, make sure the rotten part isn't touching any other yams, else it'll spread.

2. How to Tell if Your Yams are Rotten & What to Do About It.
If there's a squishy part of your uncooked yam, cut that section out. The thing about yams is that when they're uncooked, they're so dense that rotten-ness doesn't spread as fast as it does in soft fruits like peaches or bananas. You should be able to salvage most of your yam.

Same goes for fuzziness {mold}. One of my yams had a tiny fuzzy spot on it and I just cut that section out {because, ew, fuzz}; the yam was fine.

3. How to Eat a Baked Yam.
No marshmallows. That's weird.

*laughs* But no seriously, I've never tried yams or sweet potatoes any other way than simply baked. Personally, I think they're delicious without adding any of this butter or marshmallows or pumpkin spice seasoning business.

Simply pinch a section of the skin on a baked yam, pierce it with your fork tine, lift a little so that the skin is taunt, and just slide your fork down the length of the yam. Pull the skin off your yam and enjoy. They're best eaten warm, so overheat them a little when you microwave them later on.

---

And that's how it's done. These are perfect plain or I suppose they'd make a delicious base for mashed sweet potatoes, instead of boiled or steamed.
Good luck!

Wednesday, November 16, 2011

Deborah's Single Serving Apple Crumble: Guest Post

Okay, people. It's November, and in some unenlightened corners of the world, that means you keep wearing the same grody Rainbow flip-flops you've been wearing since last November. But for the rest of us, November brings the first real punch of bona fide season changes. Crisp air, apple season, and boots can mean whatever you want them to. But when the Empire apples you brought home in September start going mushy in the fridge, then it's time to stop delaying the inevitable and bake them.
I've always felt like it ought to be at least a minor felony to bake/stew/braise/otherwise process with heat fruit in the rising season, and maybe even for a week or so into peak season. I wait all year for the crunch of that first bite of apple in September, and it just seems almost sacreligious to immediately suffocate that impossible-to-get-any-other-time-of-the-year freshness with heat, even if you cover it with a butter pastry or cinnamon sugar first. Suffice to say, it is now November and past the time when it is acceptable to bake apples. Like just about everything else in my life this is clearly a love/hate relationship. On the other hand, it's almost orange season...!

---

Single Serving Apple Crumble:
{serves one}
The key to making this 'single serving' (and therefore, by definition, cute) is a small Pyrex dish, of the one-cup sort. It should look and feel like the same stuff they make their baking pans out of. Please note that oven use of these guys may not necessarily be recommended, but I've done it for a while now without any issues. You could probably also substitute a ramekin, or something otherwise oven-safe. Also, if you're one of those people-that-are-not-me with tiny appetites, this will probably make more than one serving.
This is a forgiving recipe--one of those infinitely versatile basics that are really more concept than step-by-step directions. Short of doing something like forgetting the apples, it's not easy to screw this one up. So don't panic. In the end, the only thing that really matters is whether or not your tastebuds like it. And I suppose whether or not you burn the house down.

Ingredients:
1 large tart apple--an Empire or a Cortland is best, but if you must, a Granny Smith will do. If you do this with a Fuji, Honeycrisp, Gala, or Red Delicious, just don't tell me and we'll be cool. Cool?
.5 Tbsp butter
1 Tbsp brown sugar
1 Tbsp flour
1.5 Tbsp oats

For the apples:
less than a tsp of flour
1/4 to 1/2 tsp of cinnamon
2 good shakes of nutmeg


Equipment:
sturdy fork
spoon
bowl large enough to mix your apples
1-cup Pyrex dish
{Not pictured: toaster oven}

Cream the sugar into the butter--or, if you're feeling lazy, melt the butter and stir in the sugar. Add the flour and oats, and mix with a chop-stir-chop-stir motion. You should end up with pea-sized chunks, maybe with some loose oats. If you see loose flour, you added too much flour. Put in a little bit more butter. Chunks sticking together into one big mass? Add some more oats.
{this is an example of too much flour}
Wash, peel (if you want), and slice your apple. The thinner, the better. Stir in your cinnamon, nutmeg, and flour. If you see dry flour left over after thoroughly stirring, you have too much flour. Add a squirt of lemon juice, or a 1/4 tsp. of water at a time, stirring well after each addition, until it goes away.
Layer your apples in your pyrex. Dump your topping over the top, cover with aluminum foil, and stick it in the toaster oven between 375 and 400 degF.
{pre-oven}
Leave it for about 45 minutes. Maybe longer. Maybe shorter. When the water you bake out of the apples starts to look thick and bubbly, it's about right. Pull it out (carefully!). Let it cool a bit. Scoop ice cream on top and eat right away, or pop the lid on and bring it for lunch tomorrow. Up to you.


(Whoops. No picture. I ate it before I remembered to take a picture. Sorry.)


This is easily replicated with other fruits, though the details should differ slightly by season--berries will need a tad more flour and can probably do without the nutmeg, pears should be cut thicker to avoid disintegrating, and don't do it with oranges. Yep. That's about it. Happy November, guys.


---

{sent to Sam on November 5, 2011. fail on my part. eek}

How to Choose, Cut, & Cook Cauliflower

How to Deal with a Head of Cauliflower
{Choosing, Cutting Up, & Cooking a Cauliflower}.
Whoa. Unintentional alliteration.


Step One: How to Choose a Cauliflower.
a. Go to the grocery store.
b. Find the cauliflower.
c. Eye them. Which one looks prettiest?
d. Start hefting the prettier ones to see which one feels heaviest/densest.
{Note: You'll look a little strange juggling cauliflower in the middle of the produce section, but hey. You'll be picking the bestest one there. Besides. All the other college kids will think you know what you're doing and be impressed. Maybe you'll meet your next significant other next to the broccoli and cauliflower!}
e. Once you've decided on a cauliflower, make sure to check and see if it's got any brown spots or if it smells funny. Those are bad. Choose another one. Also check the leaves and be sure they're green and non-wilty, and use a finger to gently poke at the base of the cauliflower-- it should not be squishy.
f. If it's all good, bag it and move on with your grocery shopping.

Step Two: How to Cut Up a Cauliflower.
a. Get out your cutting board, a sharp knife of some sort, a bowl to put the chopped up cauliflower in, and don't forget the cauliflower itself.
The cauliflower should have been stored in the fridge, stem side down {or white bumpy side up, same thing}. As long as it doesn't start to smell strange or have little brown spots, it's still good.
b. Take your cauliflower out of the plastic bag and place it on the cutting board. Eye it sternly and tell it firmly that you're going to win.
c. Break off as much of the leafy stuff as you can. Don't freak out if it's gross and dirty. You're not eating that part and you will wash the florets before you eat those anyways. At least, you'd better. Because if you don't, that's gross.
d. Take your knife and carefully cut as much of the stem/base/thing off as possible without cutting your fingers/hand/arm off in the process.
e. Use your knife to cut off a section of the cauliflower. Pick your section by looking for the natural separations in the giant florets and slicing carefully.
f. Cut the giant floret into littler florets. Ignore your internal perfectionist-- the littler florets aren't all going to come out the same size, shape, etc. As long as they're all in the same general range of sizes, you're good.
g. Throw your littler florets into your bowl with gusto and move onto the next giant floret.
h. Attack. With precision. Watch your fingers carefully.

Step Three: How to Wash & Cook Cauliflower.
{specifically, blanching it so that you can freeze it and eat it whenever you feel like it and not have to worry about the cook time}
a. It's advisable to blanch the cauliflower right after you cut it up. You lose nutrients and taste if you wait forever.
b. Soak your cut up cauliflower in salt water for a bit to clean the florets all nicely. Supposedly, this will make any buggies that are hiding out in your veggies get out, but I don't know about that. Mostly because I didn't see any in the water after rinsing the florets, but you never know. I'd rather wait a bit and let the stuff soak rather than crunch down on a bug in my food later. Ew.
c. There is no specific time limit for how long you should let the cauliflower sit in the salt water. I left mine in there for about an hour because I had to go to a meeting and didn't have time to cook it, and it turned out perfectly fine. I think less time is probably okay, too.
d. Drain the cauliflower and have it ready to go when you need it.
e. Bring a decent-sized pot of water to boil. You don't really need to add anything to the water.
f. Once the water's boiling, throw the cauliflower in {well, maybe not 'throw' per say because I don't want you burning yourself with hot water droplets}.
g. Stir it a bit, then let it do its thing. I set a timer for 2 and a 1/2 minutes on my phone and that worked really well.
h. After 2.5 minutes, fish out your now-blanched cauliflower and place it in a bowl. My mom actually told me 2 to 3 minutes of boiling to blanch the stuff, but I figure that the amount of time it takes me to catch all the florets and get them out of the hot water would set me over the 3 minute time limit if I set my alarm for that.
i. You're doooone. Wait for it to cool and then munch!


Other random tips/observations:
1. I tried boiling some of the florets in a water/milk mixture because it was suggested on the Internet when I went looking for how to cook cauliflower. Honestly, it didn't make enough of a difference for me to recommend it. The two things that it was supposed to affect were color and taste.

Color-wise, the cauliflower cooked in milk/water looked exactly the same as the cauliflower cooked just in water. The milk was supposed to keep it white(r).
I didn't see it.

Taste-wise, the cauliflower cooked in milk/water did have a slightly sweeter taste... it basically tasted more cooked and less raw. The cauliflower cooked normally tastes a bit more tart and raw, but it's not enough to make it worth my while to dig out the milk and measure it and pour it in and have to spend a lot more time trying to find and fish out the florets once the timer goes off. Milky water = I can't see the darn white veggies that sank to the bottom of the pot.

2. Cutting up the entire head of cauliflower took about 20-25 minutes. Not bad for a first timer. Blanching all the florets took about 10 minutes. This is definitely do-able for college kids with 2 major essays and a midterm this upcoming week. {heh. me.}

3. In terms of storage and freezing, I haven't quite gotten there yet. My mother told me to make sure that the cauliflower is completely dry and cooled off before bagging it and putting it in the freezer. I'm still waiting for it to do those things.

I'm going to bag the cauliflower cooked in milk/water and the cauliflower cooked only in water in two different bags to see if they freeze/keep differently. If the milk/water cauliflower does something funny in the freezer, I'll let you know.

4. If you find yourself wanting to try the milk/water mix anyways, the proportion of water to milk is one boiling pot of water to about a cup of milk. I used about half a cup and it was fine.

---

Tada! I think I definitely have to write up my 'How To' guides and recipes immediately after I bother about in the kitchen, else I forget what I did. Because this write-up didn't take as long as it normally would have taken me and I feel like I told you everything I learned. Tis good.

---

Resources/Acknowledgements:

Thanks to my dad for answering my texts from the grocery store when I needed help picking the perfect cauliflower.

Thanks to my mom for answering my texts about how long should I blanch the cauliflower for and how should I freeze it.

It should be made known that my parents text faster than I do. I know. I'm a failure to the teenage/college aged race. *hangs head in shame*

This website has some great information on other ways to cook cauliflower and what other types of cauliflower there are and all that good stuff. Check it out if you're still confused!
{Although, I think I wrote this more clearly than they wrote theirs because I had the help of parentals who know what they're doing, but just in case, I thought I'd include it!}

---

{written November 13, 2011}

Wednesday, September 21, 2011

Cajun Turkey Burgers & French Green Beans

{Also known as "Cooking Tip #648: Oil & Water"}

I legitimately cooked today.

I turned on the stove and everything!

Whoaaa, now.

May I present to you, *tada*, my dinner!


 Below is how I did it, with lessons learned in bold.

... And the title apparently.


Cajun Turkey Burgers with French Green Beans:
{serves... heh. One.}

Ingredients:
2 frozen turkey burgers {I know, so gourmet}
A tad of canola oil, if you're not using a non-stick pan
Cajun seasoning
French green beans

{man, this is sounding complicated...}

Instructions:
Step One: If you're using a non-stick pan, you don't really need the canola oil. I found this out the hard way. I put in about a tablespoon of canola oil {I was watching the pretty patterns it made on the pan, not really the amount... bad self!}, heated up the pan, stuck the first frozen burger in, and BAM. Hot oil splattered everywhere.

I freaked like you wouldn't believe.

Let's just say there were panicked thoughts of putting water in the pan to put out the splattering, coherent thoughts of "That'd make it even worse, stupid!", a mad grab for an oven mitt, & an almost flinging of the pan off that burner and onto another.

I also turned off the fire, on the off chance it might help stop the crackling noises.

It didn't. But it did make me feel a smidge better.

As soon as the oven mitt was off my hand, I called my dad & asked "WHAT DO I DOOO? WHAT HAVE I DONNNE?" He explained that the frozen turkey burgers have water & when that frozen water hits the hot oil, KAPOW! Things start flying everywhere.

Needless to say, lesson learned.


Step Two: Here you can either heat up the pan and then put the turkey burgers in, or you can put the turkey burgers in and then turn on the fire.

It doesn't really matter too much.


Step Three: Watch the edges of the burgers that touch the pan. When they change color from pink to brown/tanish, go ahead and flip them over.


Step Four: Once you've flipped them over, sprinkle however much of your Cajun seasoning you'd like onto your burger.


Step Five: Give them a little time, and then flip them back over to see how that bottom side is doing. If it doesn't look done, you can just keep flipping it over again and give it some more time. Remember to sprinkle more seasoning on the bottom side though at some point.


Step Six: Once you think they're done {my unofficial, not really recommended method of checking involves taking the edge of the spatula and cutting into the burger a little in the middle. If it's not pink, you're good to go}, move them to your plate and put in your green beans.

I didn't specify an amount because it's really up to you, you grown up college student, you.

Step Seven: If your green beans are frozen, but cooked, then you just need to move them around the pan a little to heat them up and let them soak up your Cajun seasoning.

If they're fresh & uncooked, though, you might want to add a little water to the pan {I know what I said about hot oil & water mixing and the results thereof, but my parents somehow do this successfully, which tells me that it can be done!}. Be sure to cover the pan with a lid though so the green beans can kind of steam/cook.


When the beans are somewhat soft to the spatula-poking {as opposed to rock solid due to being frozen or uncooked}, you can either just trust in your cooking skills and transfer them to your plate or you can taste one to see if it's the way you want it.


Step Eight: Technically, you're done now and can go eat!

However, if you were like me and that oil splattered everywhere and made it look like it rained droplets all over the stovetop, then you have just one more thing left to do... besides washing your dishes, pan, & spatula.

My cleaning tip of the day {or rather, my dad's} is that to get rid of those oil droplets on a smooth surface like the stove, simply wipe the surface down with a Lysol wipe {or whatever cleaning type wipe you want to use. I just happen to have the Lysol ones} and that'll cut through the oil and make it all go away!

I also used a wet paper towel and went over everything I Lysol-wiped down so that the chemicals wouldn't catch on fire or whatever next time I turn on the stove.

If you're picky like me and the wet streaks bother you, run a dry paper napkin over it and your stove will look like new!

*sparkle*


---


And I thought my pancake recipe post was long...

I'm guessing that I might post a few more of my 'recipes' {heh} sometime soon, although it might take me a bit to get used the fact that I'm being strange and showing you how I usually make oatmeal or scrambled eggs, but hey. College student. As I learn, the recipes should get better, right? You never know what you might learn from going back to the basics!

I was raised by a nutrition/dietetics person, so maybe I'll have some tips that you didn't know before.

... Or maybe you really don't know how to make scrambled eggs, in which case, I can help.

And just as a tada!moment, my turkey burger & green beans really did turn out pretty well, considering I freaked out about the oil & water thing and everything after that was still a little panicked.

Not bad, self, not bad.

*nods*

Saturday, September 17, 2011

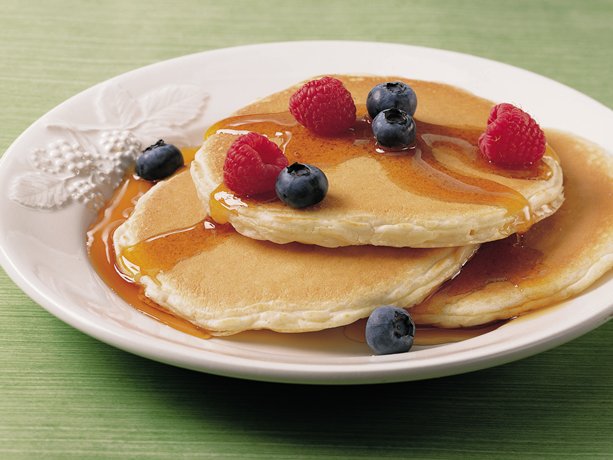
Basic Pancakes


The thing about getting an apartment is that you have to learn your stove.

You can't just assume it'll work like the one at home.

So I was very cautious when it came to making pancakes this morning.

I didn't turn the stove on super high or super low, but just left it somewhere in the middle so that I could adjust it as needed.

Er.

Apparently our stove gets very hot, very quickly, and stays there, refusing to cool off a bit when I turn the heat down.

Because, um, my pancakes are a little burnt.

Or at least, a tad darker than I'd like them to be.

So I've turned everything off and given the pan/stove time to cool down and I'll try this again in a few minutes.

Update: I turned the stove waaay down this time and thus learned by observation that the ideal setting for decent looking pancakes is 2.5 out of 7. Muaha! Lesson learned!

---

Here're some tips for making pancakes...

1. Flip INTO the pan. Not only does that make things easier on your wrists, but you won't flop the uncooked pancake over the edge of the pan and onto the stovetop.

Which is lovely fun to clean up, by the way.

*insert sarcasm font here*


2. Don't make them too complicated. I've tried that. It failed. If you want pancakes, just make pancakes. Unless you're a superawesome chef. In which case, make whatever you want. Then share with me!


3. Make sure to eat the strange looking ones yourself. Don't allow your roomie to have one of those. Cause then they might think you're not a very good pancake maker when, really, you are.

{I used this one today when it came to the darker pancakes. And see? It worked. Cause Shellie didn't eat a burnt one! Yes!}


4. If you want exclamations of "You're so cuuute!" make your pancakes small and add chocolate chips.

Works every time.

---

So if all that wasn't enough to make you wary about eating the breakfast foods I cook, here's the recipe I normally go by.

{And I swear I can make really good pancakes. Just... you know, on the stove at home. If you come back in two months, I'll have this stove figured out, too!}

{Oh. And the basic recipe comes from the back of the Bisquick box (because I cheat like that), but I add a few things to make the pancakes bettaah}.

Friday, September 16, 2011

Cupcakes, Toast, & Jam

{shellie had the one on the left with jam & butter}

Shellie & I just got the midnight munchies.

This does not bode well for things to come.

Then again, it isn't really midnight.

It's 2:10 am.

Does that make everything better?


---


On a side note, I tried to make these cupcakes today.

They sorta worked.

A little stuck to the paper and dense and not quite cupcake-like, but I did have to let them sit for about an hour while we waited for the toaster oven to cool off enough to move it.

It had been smelling kind of like burnt toast & electricity because it was too close to the back of the wood shelf it's resting on right now.

So that sitting for an hour may have affected the cupcakes' air bubbles and fluffiness.

Must try this again.

On yet another side note, because I now have an extra egg yolk in the fridge waiting to be used {the cupcakes only require an egg white}, I may or may not try out this recipe tomorrow.

The fact that I'm supposed to boil things in a sauce pan that may stick to the bottom {specifically sugar} makes me kinda nervous though, so we'll see.

If anyone has any recipes that will use up one egg yolk and that doesn't require a trip to a gourmet grocery store, I'd love to hear about them!

Thursday, August 11, 2011

Mac & Cheese or Pasta Primavera

{it's crispy!}

The Backstory:

Since I go back to school soon, I thought it might be a good time to start going through the boxes I brought home with me from college this past June. Yes, I am one of those slightly disorganized, deal-with-it-when-I-have-to type people who leave things until last minute. What can I say? It's worked for me so far.

While I was sorting through the stuff, I found the drawstring bag that Target always gives us UCLA students at College Run Night. Our school and the lovely Target team up every year to have those massive tour bus type buses come by the dorms and pick up students who realize after their parents have already dropped them off that they need shampoo or notebooks or a TV or whathaveyou. The buses then whisk them off to a local Target that's open only to UCLA students that night from 11 pm until about 2 am.

College students don't sleep. That's why that time frame works.

Target sponsors the games, the food, the prizes, the giveaways, the music {they hire DJs...}, the works. Seriously, it's kind of like Black Friday in the middle of September. And it's fun! Just to go and see everything is awe-inspiring in itself. I've gone with my roomies for the past two years and we make it a roomie date.

As you walk out the door, you're handed a drawstring bag with a fun Target logo pattern on it and inside there's a bunch of things that are pretty much free {ish} marketing for the companies who are giving them away to the ohsogullible college students. In all seriousness, though, the store does a pretty good job of thinking about what a college student might need and putting either coupons or a free sample in the bag.

In past years, there's been an entire bottle of Method handsoap {I happen to love their products/marketing, so that was fun}, a full-sized bag of cotton balls, a box of bandaids, a box of zip-lock bags, a few garbage bags, Post-It notes, coffee samples {ewcoffee}, and miscellaneous food and beauty/hygiene products.

---

The Point:

{ooh, pretty colors!}
This past year, one of the things in the bag was a sample of their instant mac & cheese.

I normally don't eat mac & cheese, mostly because my mother is a dietician and the boxed stuff is super unhealthy.

Last night, I decided to be brave.

I decided to risk the forces of carcinogens and saturated fats.


And got wide-eyed at the color of the stuff after it'd been 'cooked.'

It really does look like the Crayola Crayon color!

Goodness.


It didn't taste too bad, but the fact that it was an unnatural shade of yellowish-orange was a bit off-putting.

I don't think I'm the instant mac&cheese, Ramen type college student. I do like pasta, but I believe that the prep time should take more than three minutes.

Just saying.


---


Anybody a super fan of instant mac & cheese? How about the gourmet, real-cheese type? Try anything brave lately? Do any late night shopping?

And which colors in the Crayola Crayon box did you always remember as a kid? For me, it was the Mac & Cheese yellow and Tickle Me Pink. Neither of which I used. Didn't like that shade of yellow, don't like pink. Whyyy I remembered those two the most then is beyond me. *shrugs*

Wednesday, August 10, 2011

Better Than Cookies

{Mmm}
While I wouldn't consider myself a brownie connoisseur by any means, simply due to the fact that I don't usually play with the recipe and my brownies come from a box {sacrilege, I know}, I am rather good at the brownies I do make.

Thus, here are some tips for those of you who might be interested!
 ---
 
{we make a great pear!}

1. If you'd like to make your brownies slightly more healthy {although I stand by my opinion that chocolate is always healthy}, you can substitute the 1/2 cup of vegetable oil with a 4 oz container of apple sauce. If that sounds kind of complicated, it's not really. A 4 oz container of apple sauce is how much is in one of those kiddie-sized things that come in a six-pack at the grocery store. See? Already prepackaged. Perfect!

Note, however, that if you don't use any oil at all and put in only apple sauce, you will get cake-like brownies that have a marginally heavier quality than cake. In other words, a bit of a weird texture. But if you just need that chocolate fix and you don't want to deal with the possible consequences, this apple sauce substitution works.

---

2. When the box says to "Grease (or use cooking spray) bottom of pan," do just that. Don't spray the sides, too. I keep forgetting and the spray makes the brownie batter slide back down when it's trying to rise. Hence, flat brownies. Sadness.

---

{whisk}

3. Take a finger to the bowl. Brownie batter is the only uncooked form of a baked good that I'll eat. Possibly a bad habit, but since the ratio of egg to other ingredients is smaller here than in cookie dough, I don't think it'll kill me. Mmm. And it does taste yummy.


---


Aiight, let's try to settle the great debate...

Brownies or Cookies?

My vote's for brownies.

Tuesday, August 9, 2011

Patience, Young One.

{wait for it}
Today, I learned an important lesson in cooking.


Patience.


Seriously, after two days of my parents entrusting their lives in my hands as I attempted to make dinner, the most important thing I learned was to just waaaaaait.

Don't bother the food when it's cooking if it's not burning or boiling over.

It's fiiiine.

I really don't know if I'm going to be able to resist the urge to check the food's progress in the future. If I don't know what it's doing, how do I know it's okay? *wide eyes* What if I mess up? Auuuuugh!

Oh, cooking. Who knew that the hardest part would be leaving the food alone? *sigh*

Wednesday, August 3, 2011

The Bane of Bell Peppers

{look at them just sittin' there. all innocent like. pfft.}
Yesterday, I made dinner.

Sort of.
I decided what I wanted to have for dinner, got all the ingredients together, started cooking… And then my dad decided I was taking too long, so he stepped in and helped with everything. I don’t know whether to sigh because I didn’t get to do it myself or be thankful because dinner didn’t take two hours to put together.
I think I’ll do both.
All this to say: I really dislike bell peppers.
Yes, this is indeed a post about the ickiness that is bell peppers. Of any color. Ew.
I’m sure everyone has at least one food item that just makes them cringe a bit. I’m not saying I won’t eat bell peppers; I’m just not the biggest fan of the things.
Why?
A few years ago, my mother went on this kick where she added bell peppers to absolutely everything. Not only are bell peppers good for adding color to a dish, but they’re nutritious and she kind of liked them. I had been neutral up to this point about the veggies—they hadn’t shown up in my dinner all that often before so I didn’t really care one way or another. After a few months of the things making an appearance in almost every single meal I ate, I had definitely formed an opinion.
So when my dad tossed in some frozen bell peppers into the pasta sauce yesterday… *sigh* I was sad. However, because of all the other wonderful goodness I’d chosen for the sauce, I can’t actually taste them! *yay*
But I know they’re there. *suspicious glance into the pot* Waiting for me. Lurking. Just biding their time. Sneaky things.
---
What food makes you shiver a little? Any adventurous eaters out there who will eat anything at least once? You’re brave, my friend, very brave. I applaud you.

Thursday, July 21, 2011

Fancy Pancakes

{I WISH My Pancakes Looked That Good}
Yesterday was my dad’s birthday and, like I promised, I woke up early and made him the Cinnamon Roll Pancakes.

Never again.

The first two were made following the directions in the recipe and they turned out sticky, gooey, and underdone. The mess they made after I tried to flip them over was so bad that I actually turned off the stove, picked up the pan, brought it over to the sink, and doused the entire thing to get the melted brown sugar off. *facepalm*

Take two, I gave up and mixed the cinnamon roll filling into the batter. The pancakes definitely made less of a mess and they did look better, but… I don’t know. After these failed attempts at fancy pancakes, I think I’ll go back to normal pancakes. I’m very good at those. Not only do they look nice and fluffy and pretty, they taste better, too. *grins* I feel like I have to make those and take some pictures so you know what real pancakes look like and to prove to you that I actually know what I’m doing around breakfast foods!

---

The Point of the Story:

1. If you’re going to follow someone else’s recipe, think twice when it calls for more liquid in the batter than solid. Something’s wrong there. You’re going to get flat pancakes. Like… flatflat pancakes.

2. A lot of sugar in the batter = food burning/turning brown a lot faster. Steben, this is for you. You’ve been forewarned.

3. The cinnamon roll filling would be good for some other baking project. As it is, I feel like that was a waste of a stick of butter… However, since we rarely use cinnamon in our house, this was a good use of a spice that’s probably been sitting in our cabinet since… I was five?

4. They really didn’t taste too bad. They just looked a little strange. Like whole wheat pancakes when really, they were full of fat and sugar. Actually, that’s a win-win situation right there. Never mind! This wasn’t a failed cooking attempt after all! *laughs*

{Real Whole Wheat Pancakes}

Monday, June 27, 2011

The Little Things in Life, No. 3: Senior Standing & Strawberry Crepes

{Problems with College}
... having senior standing as of this past weekend. Whooooa me! *yaaay*


{Crepes with Strawberries}
... successfully making crepes with fresh strawberries on Saturday. Yum.


{Cleaning Supplies}
 ... cleaning the entire kitchen, dining room, and living room while my parents were out. See [this post]*.


{Stock Photo with Picasa Picnik Text}
... getting to watch Elyse take her first steps ever by herself today, and then laughing with the rest of ladies in the nursery because we were instructed by her mom to not tell her if Elyse walks without her there. So it's a secret. Shhh!

{Baguette & Prosciutto}
... coming home after VBS and my mummy made me lunch! Hee. It's a big deal.


* : I haven't written it yet. But I'll update this when I do!

Also, this is the first time I've ever played around and edited pictures. *eee* I'm so cool now!

Aaand I got a call from Debrr today! *even more excited than successfully playing around with Picasa Picnik*

Friday, June 17, 2011

French Toast

Today, I attempted French Toast.

Let's just say that I learned some PaperLanternLessons... *sheepish look*

And I still need to do the dishes from this morning's kitchen experiment.

Amendment: Captioning this post took so long, I finished doing the dishes. Sink's all clean now! Yay!

---


Here's my attempt at being artsy. I must say that while that front piece looks pretty good, the angle of this shot makes the rest of the slices look... less than appetizing...


I think this is my favorite picture of my French Toast. Probably because it looks like they turned out wonderful.


The side I did on my own...


The side where my mother came by and turned up the fire under my pan because she thought it wasn't doing anything. *sigh*


Hee. Foodie blogger shot!


Oookay. So it didn't really taste so great. Therefore, I thought I'd try to salvage it by making French Toast Sticks...


Like so.


They were... meh.

---

PaperLanternLessons learned on this one are as follows:

One: If you're not planning on baking the French Toast like the recipe calls for, then don't use 1-inch thick pieces of bread. Because when you try to cook it in a pan like pancakes, the middle stays raw no matter how burnt the outside may get.

Two: Yeah, that's about it.


Note: From 9pm to midnight later, I baked Banana Bread. First time. Post coming soon!